
A transaction is money moving into or out of your control, as income or an expense: your salary, a coffee, a bill.
Where to find it: the Plus button in the bottom right of these screens:
 Plus button in the bottom right of these screens:
- The home screen
- The Timeline tab
- A day in the calendar
- An account's transaction list
- Your phone's home screen, as the Add transaction widget
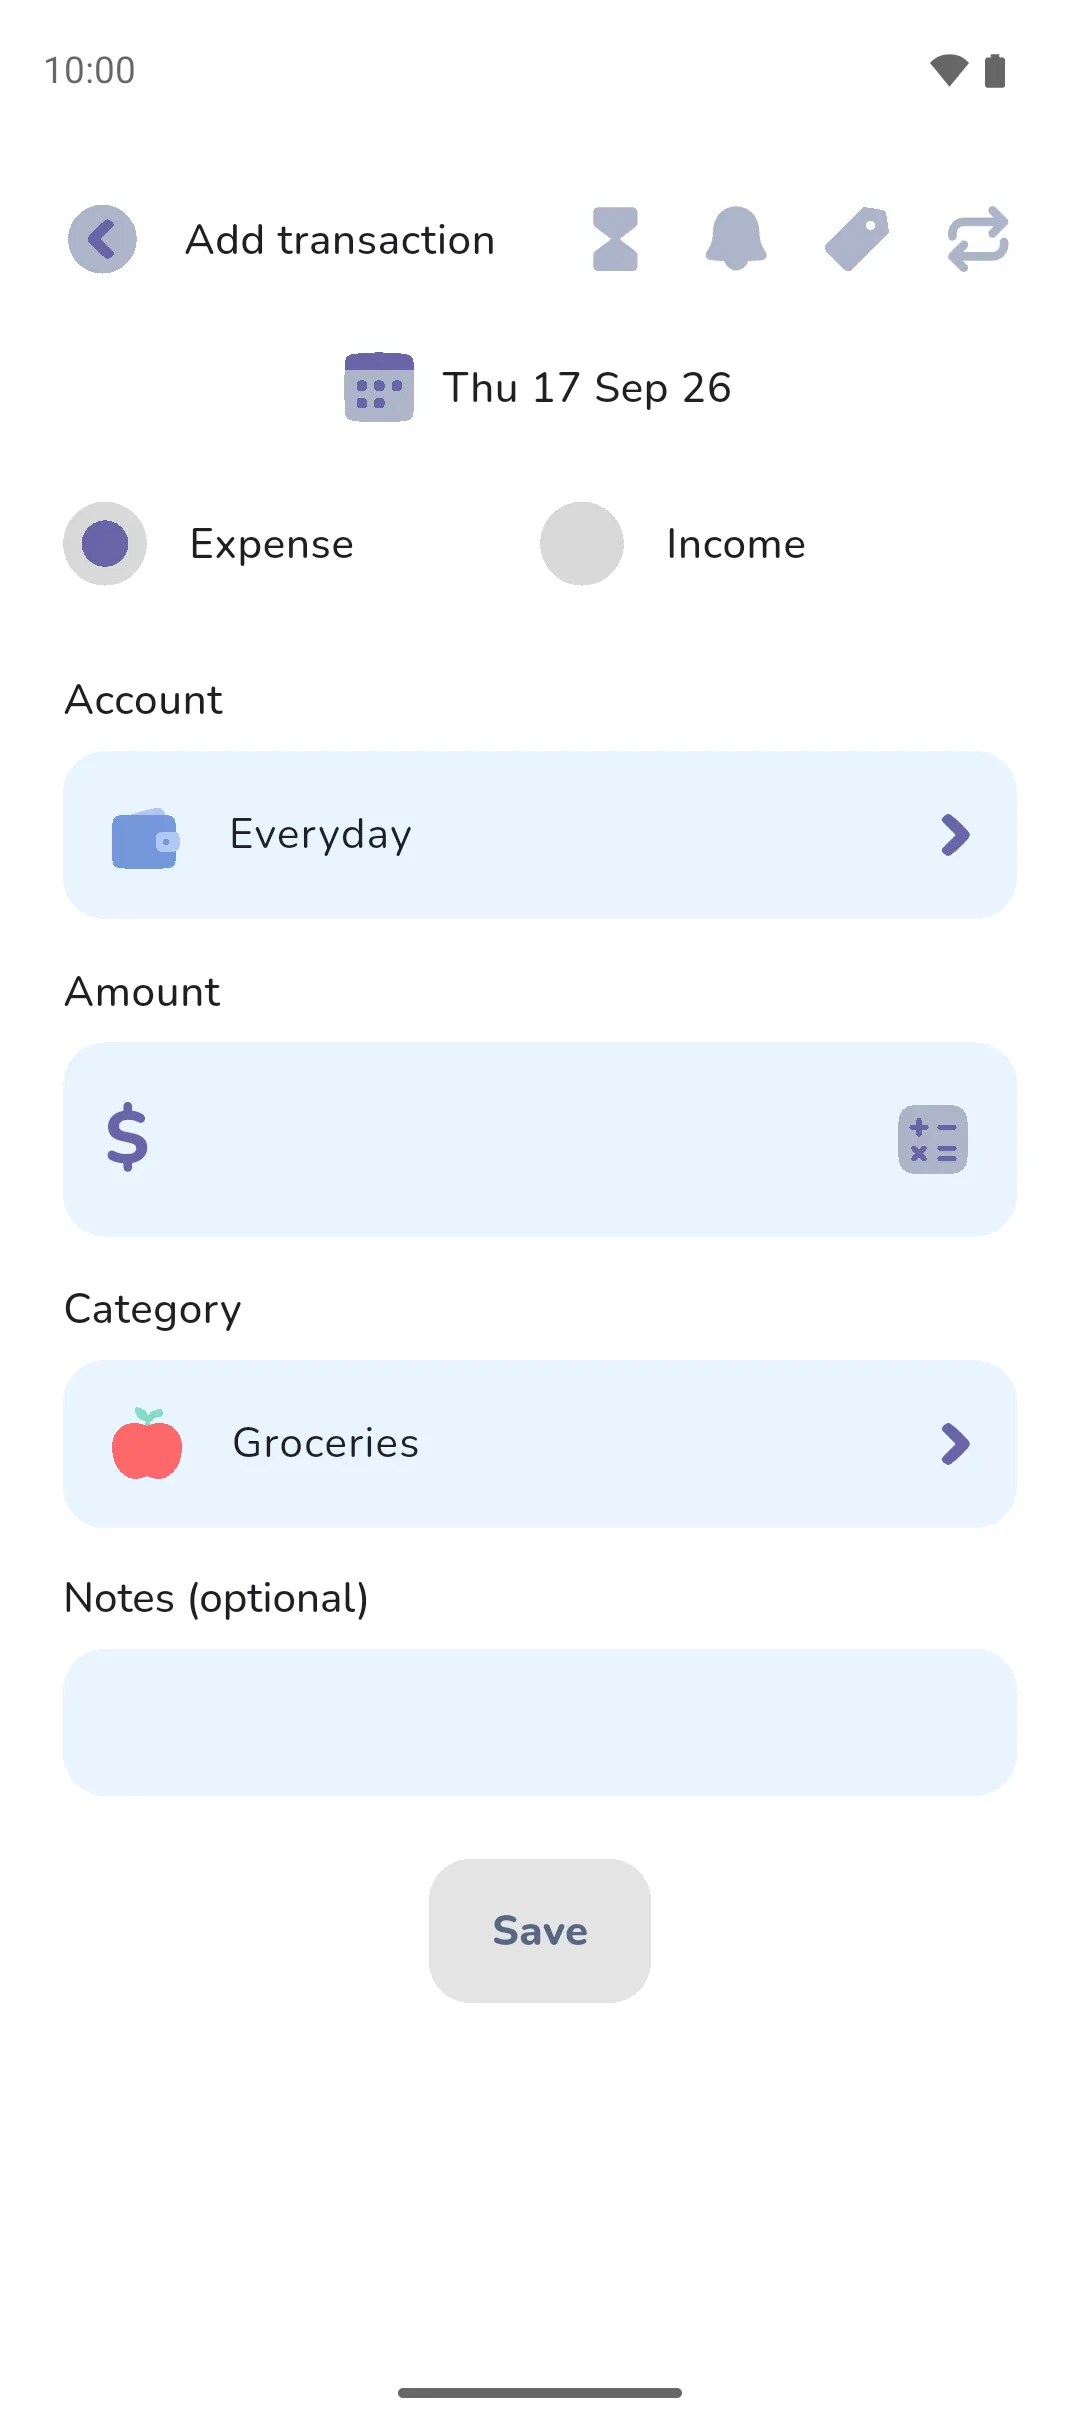
The screen is titled Add transaction.
Log an income or expense
- Pick Expense or Income.
- In a Money Manager book, choose the Account the money left or arrived in. An Expense Tracker book skips this.
- Enter the Amount. The Calculator icon opens a keypad that adds, subtracts, multiplies and divides, handy for splitting a bill.
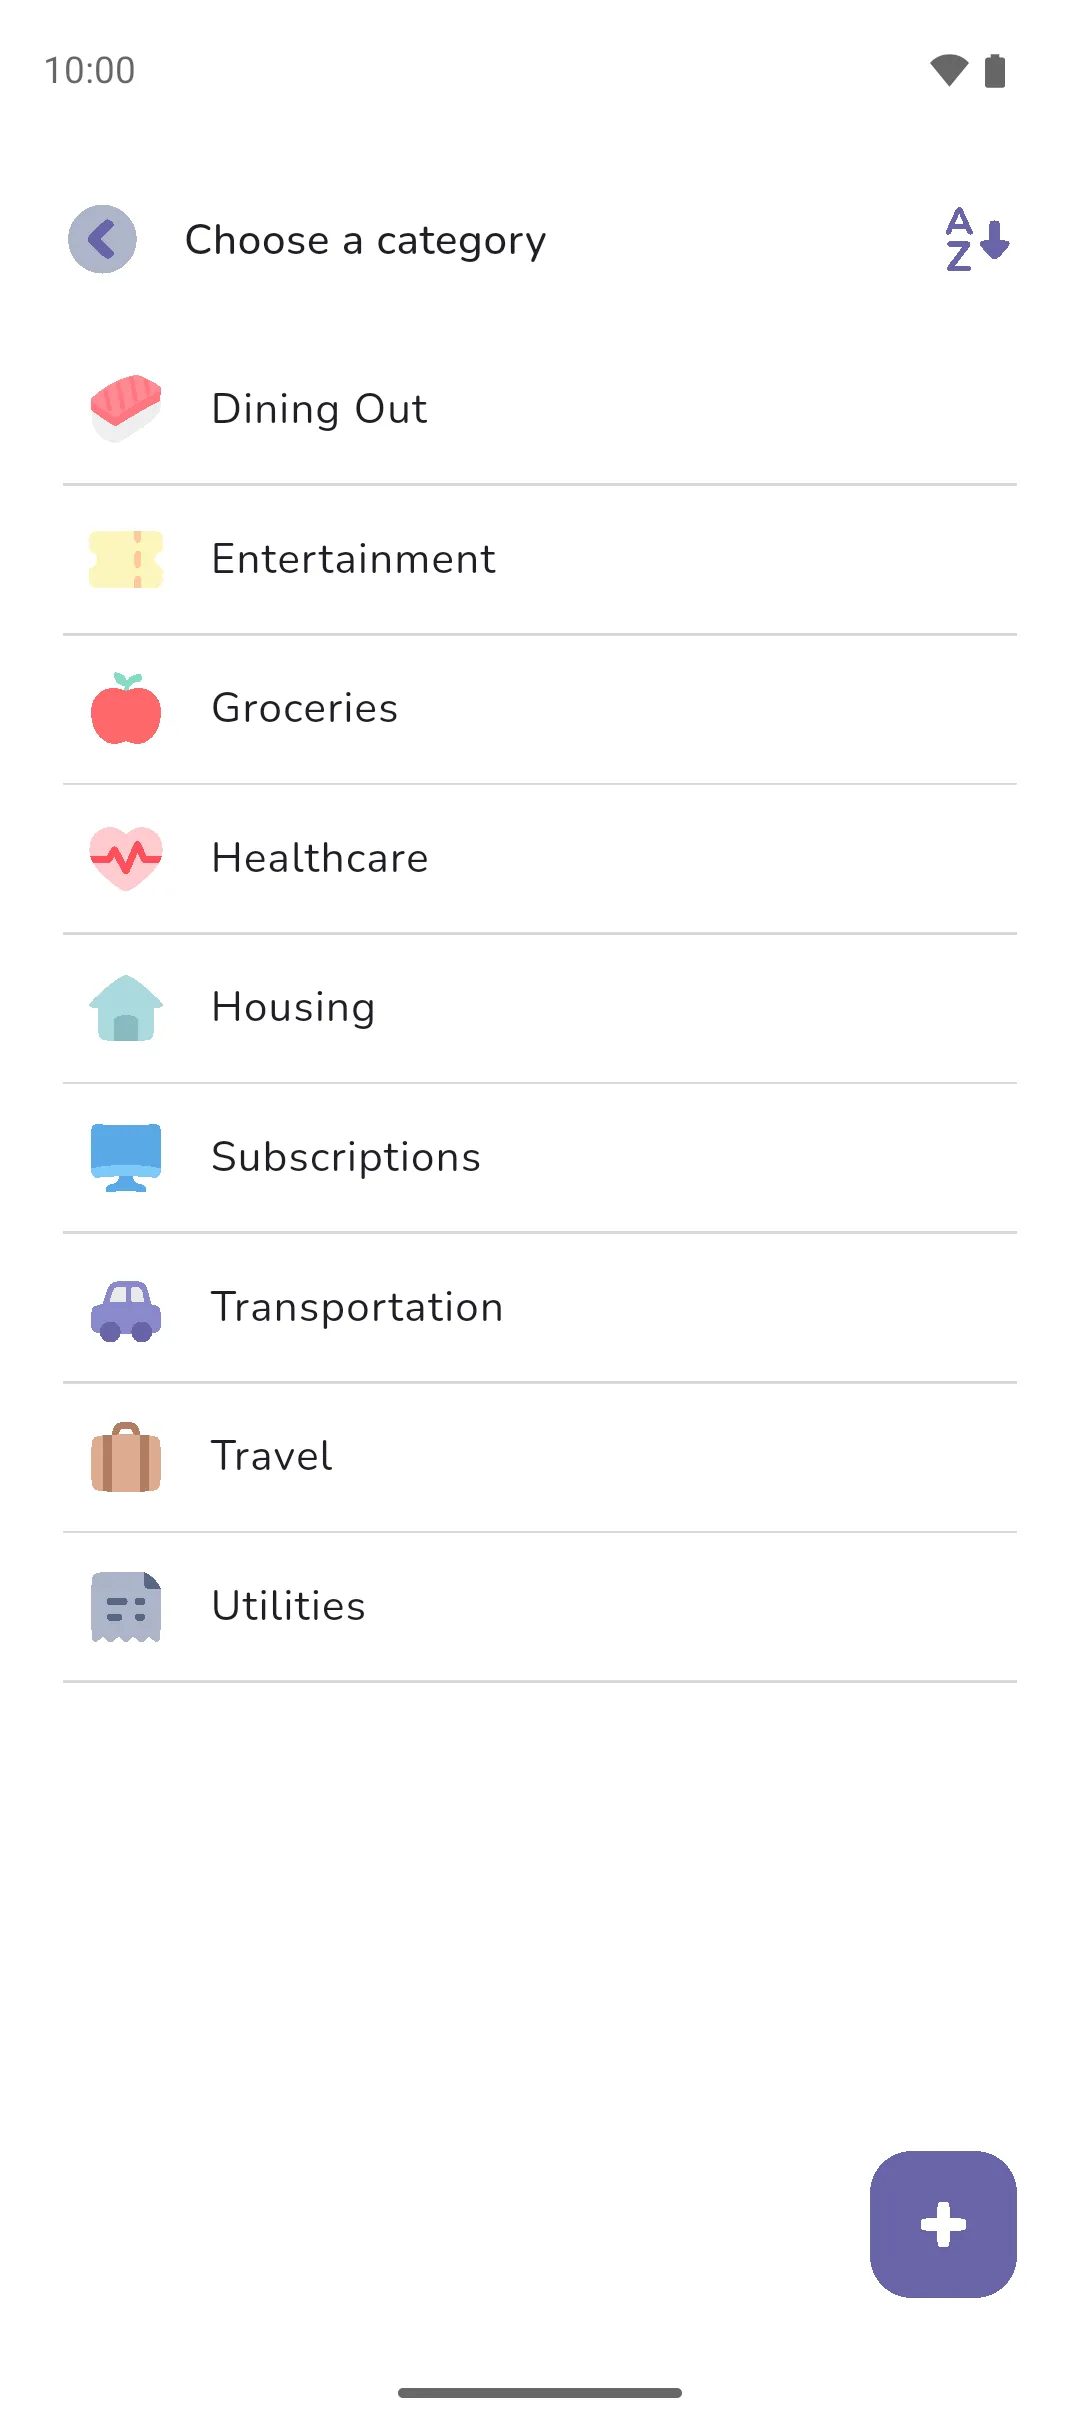
- Tap Category and choose one. The picker sorts alphabetically, or by most recently used with the toggle at the top. Nothing fits? The Plus button creates a category on the spot.
- Add a note under Notes (optional) if you'll want to find this later.
- Tap Save.
 Calculator icon opens a keypad that adds, subtracts, multiplies and divides, handy for splitting a bill.
The date is today. Tap it to change it. Times stay hidden unless Show transaction time is on under Settings → Date and time.
The icons along the top
- The Status icon, an hourglass, opens Status. A transaction dated today or earlier is Settled, meaning the money has moved, or Pending if it hasn't yet. A future date offers Pending or Pending, settles automatically. Pending money doesn't count in your balance until it settles: see Pending and settled.
- The Reminder icon sets a Reminder for a future or recurring transaction, from the day itself to a week before. Pro is required for reminders.
- The Tags icon opens Select tags. Tick the tags you want and tap Apply. Pro is required for tags. See Tags.
- The Recurrence icon opens Recurrence, for a salary, rent or a subscription. See Recurring transactions and transfers.
 Status icon, an hourglass, opens Status. A transaction dated today or earlier is Settled, meaning the money has moved, or Pending if it hasn't yet. A future date offers Pending or Pending, settles automatically. Pending money doesn't count in your balance until it settles: see
  Reminder icon sets a Reminder for a future or recurring transaction, from the day itself to a week before.
  Tags icon opens Select tags. Tick the tags you want and tap Apply.
  Recurrence icon opens Recurrence, for a salary, rent or a subscription. See
 Edit or delete a transaction
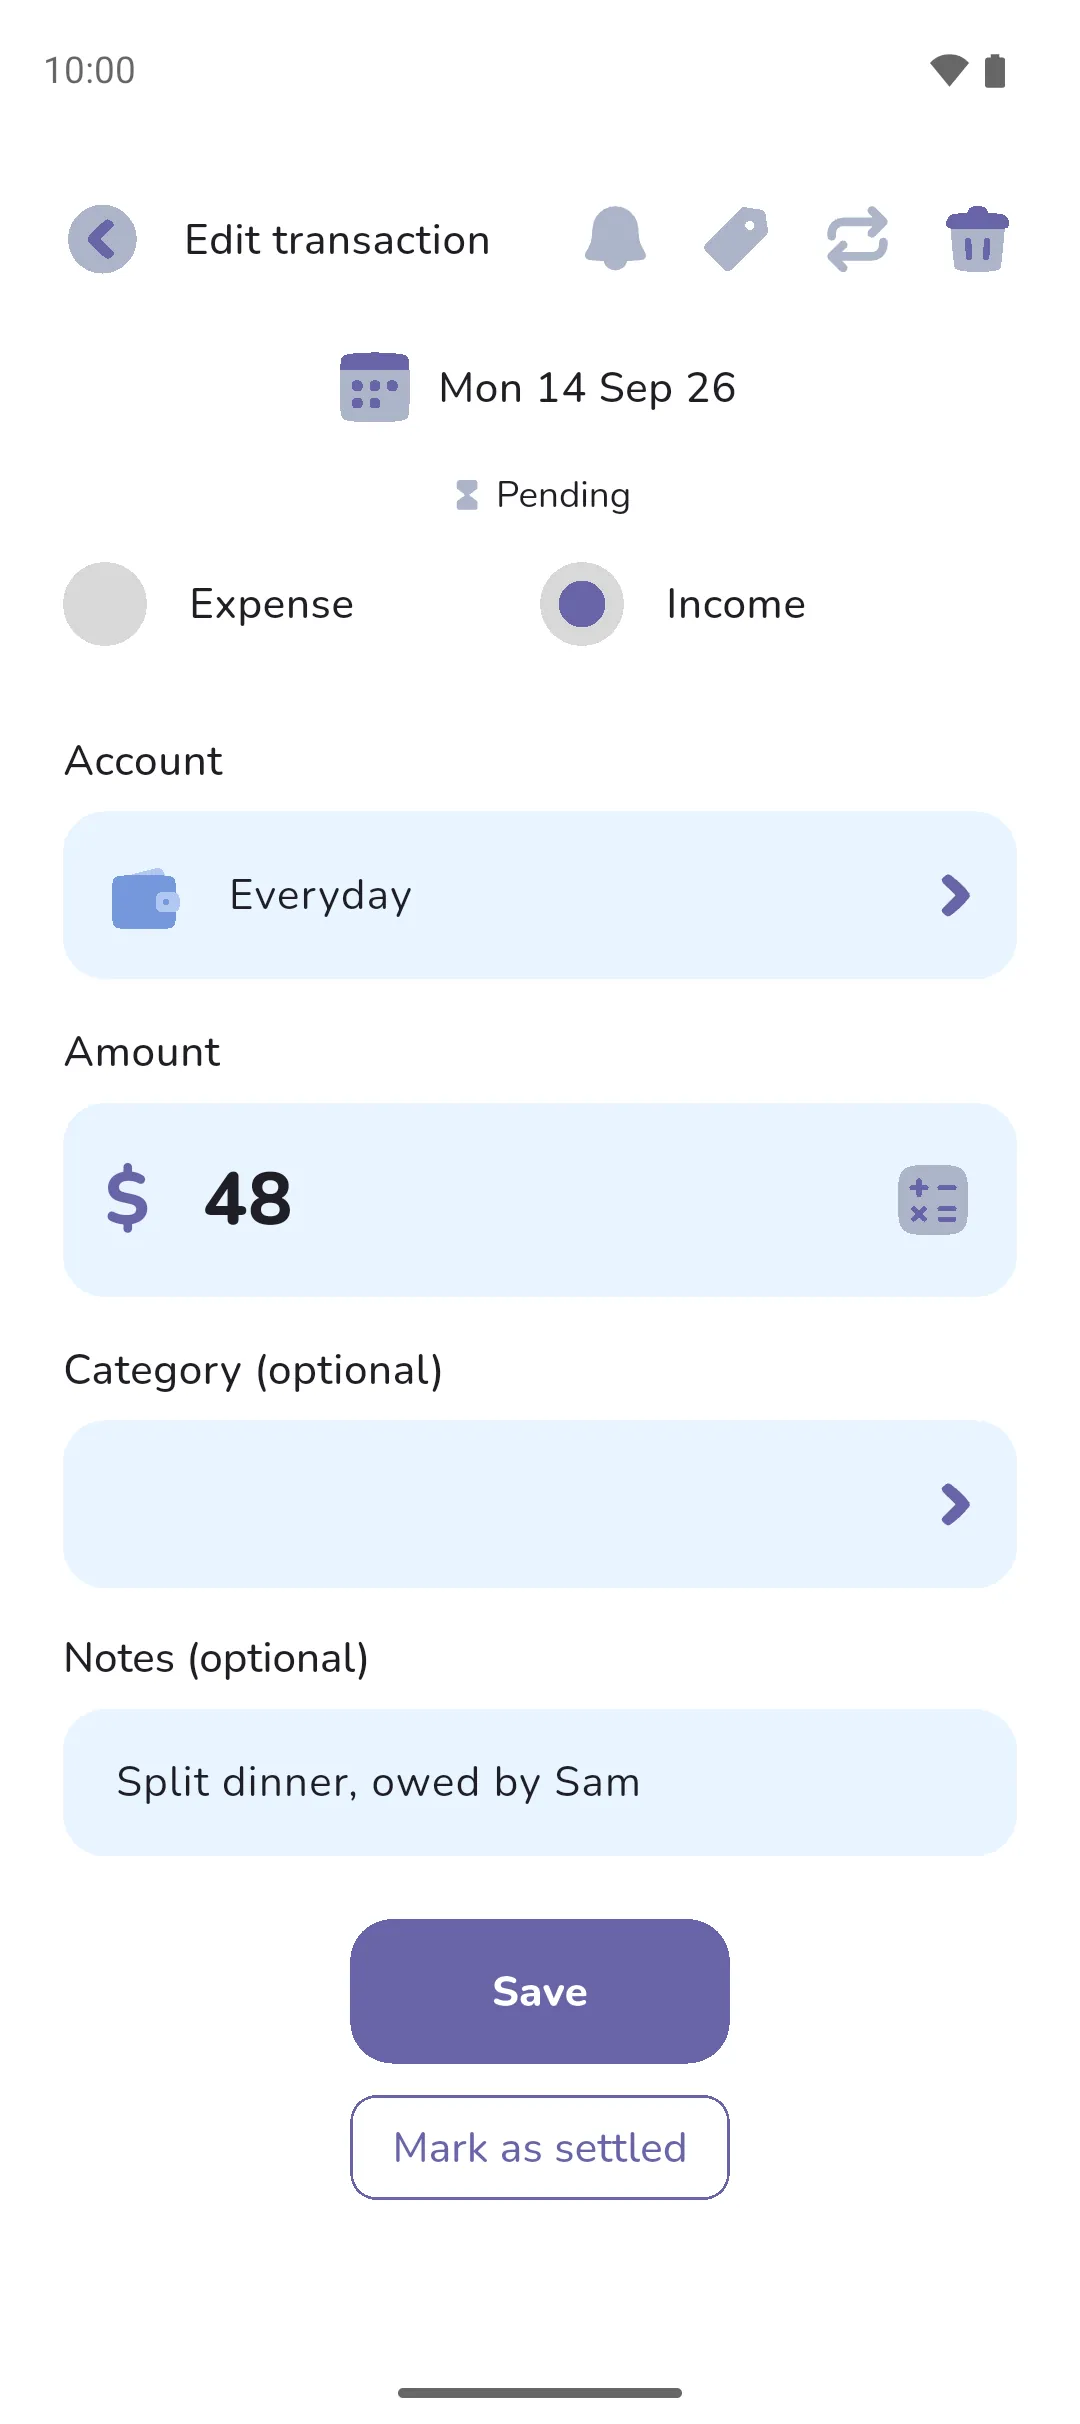
Tap the transaction wherever you see it: the home screen, an account, the calendar or the pending list. Change what you need and tap Save, or tap the Delete icon to delete it. A pending transaction dated today or earlier shows Mark as settled under the save button.
 Delete icon to delete it. A pending transaction dated today or earlier shows Mark as settled under the save button.
For a transaction that belongs to a recurring series, the app asks how far the change reaches: This only, This and following, All, Pending transactions or Settled transactions. Changing the date applies to this one only. Deleting offers the same choices without the settled option. The series itself, its frequency and end date, is edited from the Book icon → Recurring transactions.
 Book icon → Recurring transactions.
- The category defaults to the last one you used in the book.
- A category is required unless the transaction is plain Pending, because a settled transaction has to land in your budget somewhere.
- A transaction in the future starts as Pending, settles automatically, and the app remembers whichever status you last chose for future ones.
- In a Money Manager book the account list shows only manual accounts. With Pro Sync: a linked account's transactions arrive from the bank and are handled in Reviewing transactions.
- A transaction is money in or out of your finances. Money moved between your own accounts, or into a tracker, is a transfer, so it doesn't count as income or an expense.
See also: Transfers, Pending and settled, Recurring transactions and transfers, and the pending transactions post.